


I’ve been banging on about how much I disliked our kitchen ever since we moved into our house this February. The whole house needed a complete refurbishment and, to be fair, we’ve done a pretty good job so far, completing the majority of the house to our taste within the first six months. But upon finding out I was pregnant we decided that the kitchen would have to wait since it’s by far the biggest project to take on and the biggest expense…
However, when my maternity leave began a couple of weeks back I decided that I could use this time to give the kitchen a bit of a makeover…If I’m honest, I was only planning to paint the tiles in the first instance and replace the lights. And then I decided that it wouldn’t be too much trouble to give the walls a lick of paint before I got slightly (very) obsessed and – to the groans and concerned protests of friends and family (“now is the time you should be resting”) thought it would be a great idea to tackle the units (since “what’s the point in me going to all that effort if the cupboards still look shit?”)
I’d opted for a plain white Ronseal One Coat Tile Paint to freshen up the tiles and Dulux Egyption Cotton emulsion for the walls. I wasn’t overly confident about the Ronseal tile paint – I attempted to paint our garden fence last year with their pressurised sprayer and learnt the hard way that their products certainly do not always do ‘exactly what it says on the tin’. However this brand seems to have completely monopolised the shelves in the likes of B&Q and Homebase so I decided to give them another chance.
The results were pretty good to be fair. The tiles did need two coats and the finish is slightly linear in places where you can see the brush strokes, but it looks like they’re supposed to be like that (or so I tell myself!)


Two coats of tile paint, and two coats of emulsion on the walls later, the kitchen did look much better to me, but I could tell that hardly anyone else noticed. There were just so many brown units in the way… I needed to do the cupboards.
Mr M insisted that my efforts were the equivalent of me trying to polish a turd and thought painting the units was one step too far, but he came to realise that you can’t get in between a pregnant woman and her cupboard paint…

Not really one coat cupboard paint…
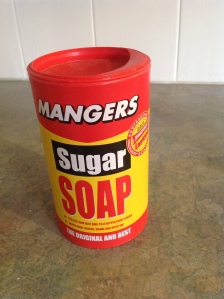
You need this in your life
Again, I opted for Ronseal since they were the only brand that was in stock in the colour that I wanted. Anyway, I needed to get home in time to paint as much as I could before Mr M got home so there could be no going back. Sneaky.
I didn’t bother sanding the melamine units, but used Sugar Soap to remove all of the dirt and grime which I’d seen done on a YouTube video. I’d never used Sugar Soap before and to say that I was amazed is an understatement – it’s so easy to use and literally makes cleaning a doddle (I’ve since used it on the ceramic floor too with great results).


Again, the units did need two coats of paint and in some places three, but I’m really chuffed with the results.
I finished it off with some blackboard paint and added this typography with a chalkboard pen to create a bit of a feature.
The final results are well worth a couple of weeks of graft to get a kitchen which feels much more like my own – even if it will be ripped out in 12 months!
Now, how do I get Mr M to change that worktop?

Looks great! 🙂
LikeLike
Thanks! Got there in the end 🙂
LikeLike
Amazing transformation! Did you know there are countertop painting kits out there??
LikeLike
No way?? You shouldn’t have told me that I’ll be doing that next haha! 🙂
LikeLike
I’ve seen them at Home Depot if you’re near one but I’ve also painted my own with regular paint to look like black granite and polyurethaned it a few coats with high gloss (water based- oil yellows over time) and it lasted years and years. Super inexpensive. Oh and thanks for following!!
LikeLiked by 1 person
Brilliant, looks like a new kitchen.
LikeLike
Glad you like it!! 🙂
LikeLike
Pingback: Cool ways to use blackboard paint in your home | Mum in Brum
Hi this looks amazing especially as you did it whilst pregnant i definitely don’t have an excuse. Just a couple of questions, did you remove the cabinets? i see you didn’t sand did you do anything else instead?did you gloss after or just the ronseal paint?x
LikeLike
Hi Dian, glad you like it! I didn’t sand at all I just used the sugar soap to get rid of any grease/dirt etc and it primed the surfaces really well. You don’t need to use an additional primer with the Ronseal cupboard paint. I didn’t bother removing the cabinets and managed to get in most of the nuts and crannys. Didn’t use gloss either – it leaves a nice satin like finish on its own. I think I needed three tins in total. One thing I would say is use good paint brushes and don’t be shy to apply it thick as it can leave paintbrush marks otherwise. Good luck with your project! xx
LikeLike
Also how many tins did you use? Thanks
LikeLike
Pingback: Creating our dream kitchen | Mum in Brum